If you're an avid reader on here you probably remember me from June when I guest posted here.
If not then let me introduce myself! I'm a newbie blogger and I'm loving every minute of it! I ran my first half marathon back in April and will run again next year. I love food! I have 2 link ups - Insta-Recap of My Instagram and Weekly TV Roundup. Amber and I are working on another one - Link Up Your Link Up.
I love geocaching! I try to be crafty! My new thing is wreaths. Yeah, why? Who knows? Check out this general one and then a 4th of July one.
My husband and I have 2 furkids! One is adopted, the other is the offspring of my mothers dog. They frequently take over my Instagram! Be aware!
If you wanna know some more stuff about me, check it out here.
This time I'm bringing you a small tutorial and a giveaway.
The giveaway is a burlap wreath, 12 inch wreath to be exact. It might look bigger in the picture, but its a small one. But it's a giveaway! :)
I'm also putting a tutorial with it. I tend to feel I'm crafty, but sometimes I just can't do things. For instance, the burlap flowers on the wreath. I tried like 3 separate ways (and times) to make this thing! And could not figure it out. I almost bought ones that were already made at Hobby Lobby! But I thought, let me try getting on Pinterest and YouTube AGAIN. I have to give kudos to this lady who wrote her tutorial.
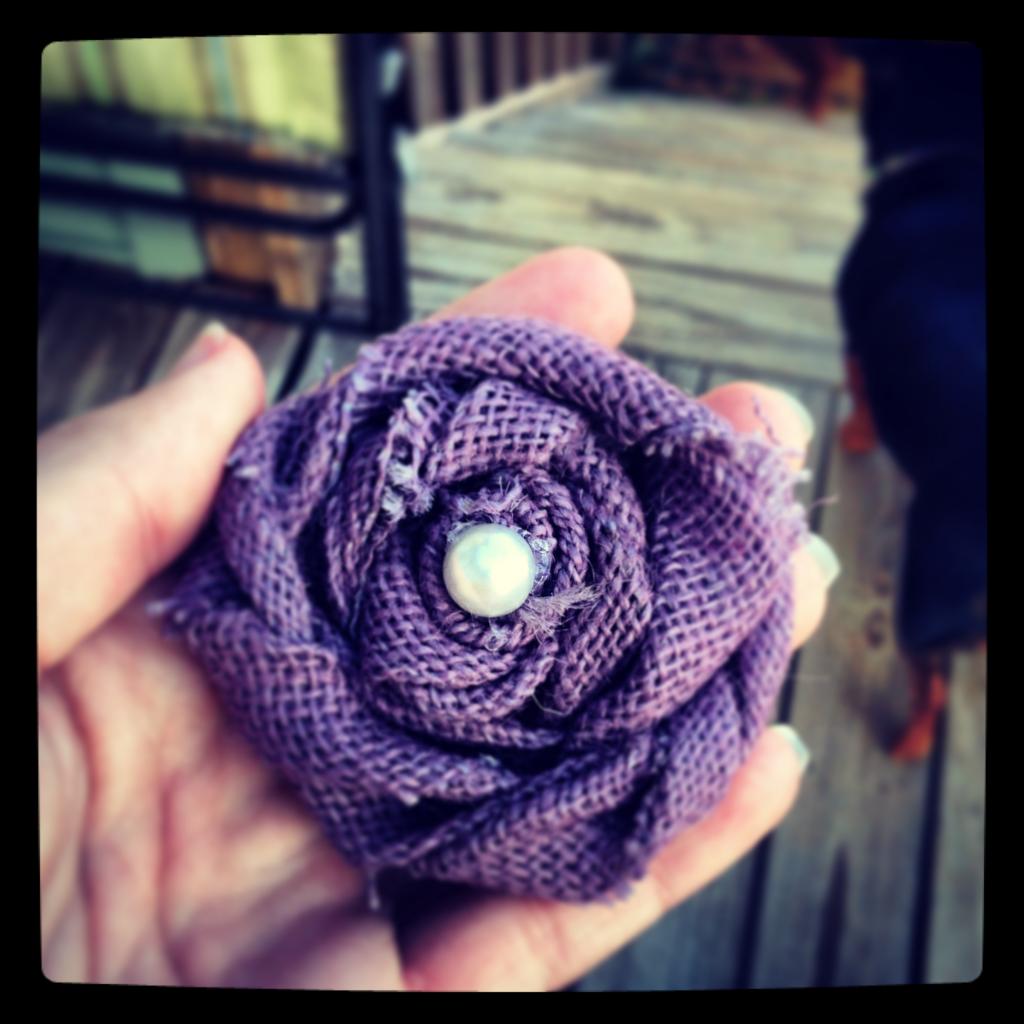
So, we will be making this today:
First you will cut a 3 inch strip of burlap. How long? Depends how big you want your flower.
You will then fold one side of it (not all of it, you'll do something else to the rest) once, then again.
Then you'll roll it a few times until it looks like this:
Then the rest of the burlap you have left you will twist as you create your flower.
Once you get the desired size, cut of the rest of the burlap, then hot glue the end piece so it's hidden (if possible). Then you'll get a square the size of your burlap and hot glue it. You'll then place your rose on this square. This will secure it in place.
Of course your flower is circle and your piece of burlap is square, you'll cut off the edges so you can see them. :)
Then you'll have this pretty puppy!
The wreath I'm giving away was made like this July 4th wreath. Although the one I'm giving away is burlap, the same concept was used. Burlap freys so I sprayed some fabric stiffener on there, so I'm hoping it'll stay in tact through the shipment to the lucky winner! :)
a Rafflecopter giveaway

3 comments:
Thanks for this!! So cute! http://weareadifferentkindofwoman.blogspot.com/
So its just wrapping it around?
What a cute wreath! And I'm not even normally a fan of THAT much burlap...but I'd totally hang this on my door. :)
Post a Comment